Big Fish: Using Multiple Fish Fabrics
Let's make things a bit more interesting!
The original, ORIGINAL version of this pattern was designed to be fat quarter friendly, but unfortunately that method resulted in a lot of extra pieces being cut and not used, and I didn't feel good about passing that along to you, the end users. It was just too inefficient and wasteful!
However, I can totally appreciate that some of you may want to jazz things up, so I wrote this guide to give you the option of making fish in THREE body+fin combinations. Why just three? Well, with the way some half square triangles are shared between fish to reduce waste, this is how the math works best... and the math only works cleanly in the baby and throw sizes, so those are the ones I'm including here.
If you'll be making another size and want me to help you figure out the best way to use multiple fabrics, I'm happy to brainstorm that with you! Just send me an email at Christine@EarlyBirdQuilts.com, and let's work through it together!
Choose 3 Body fabrics and 3 Fin fabrics!
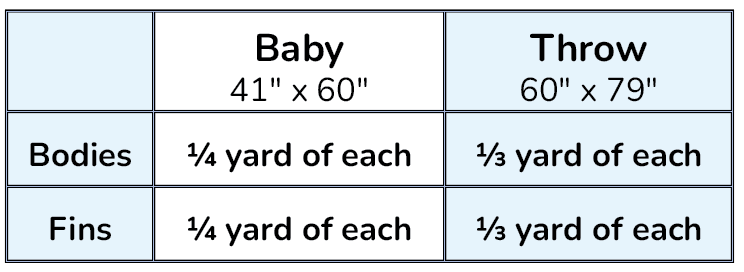
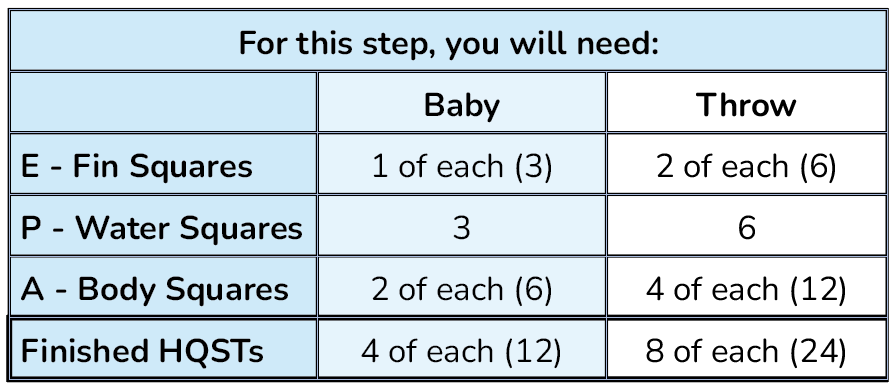
Here is how much fabric you will need.
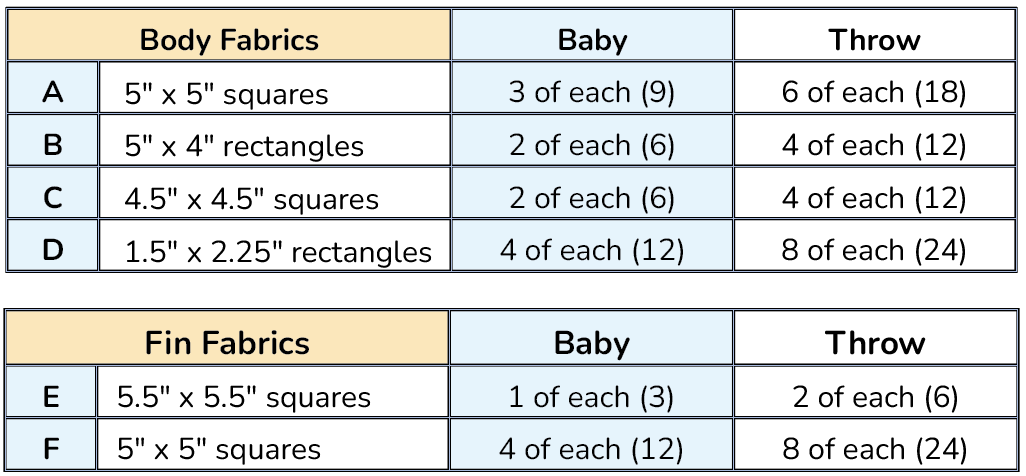
Cut the Necessary Pieces:
Follow these Directions:
For steps 1-17, follow the directions in the original pattern.
Starting with step 18:

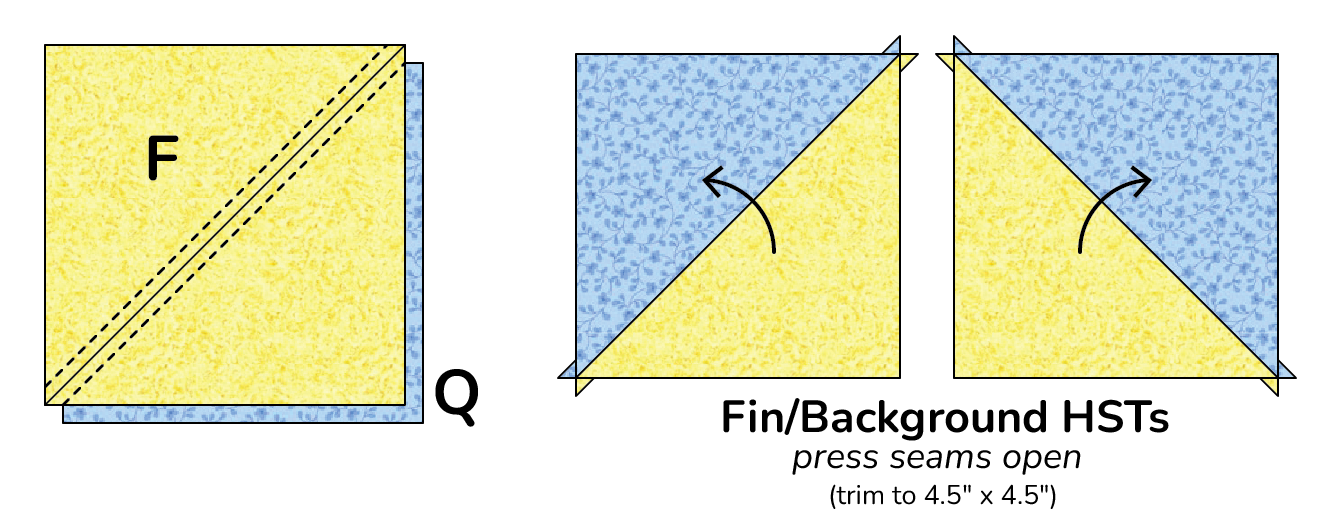
18 - Draw a diagonal line on the wrong side of each F fin fabric square.
19 - Place each F square right sides together with a Q background fabric square, then sew ¼” away from the line on both sides.
20 - Cut along the drawn lines, press open, and trim to make 4.5” x 4.5” HSTs.
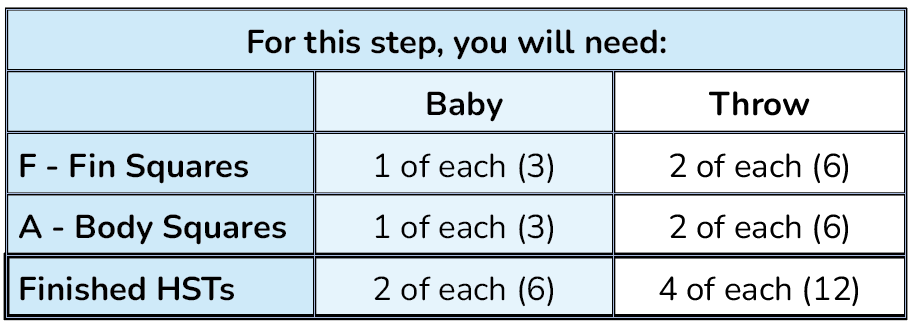
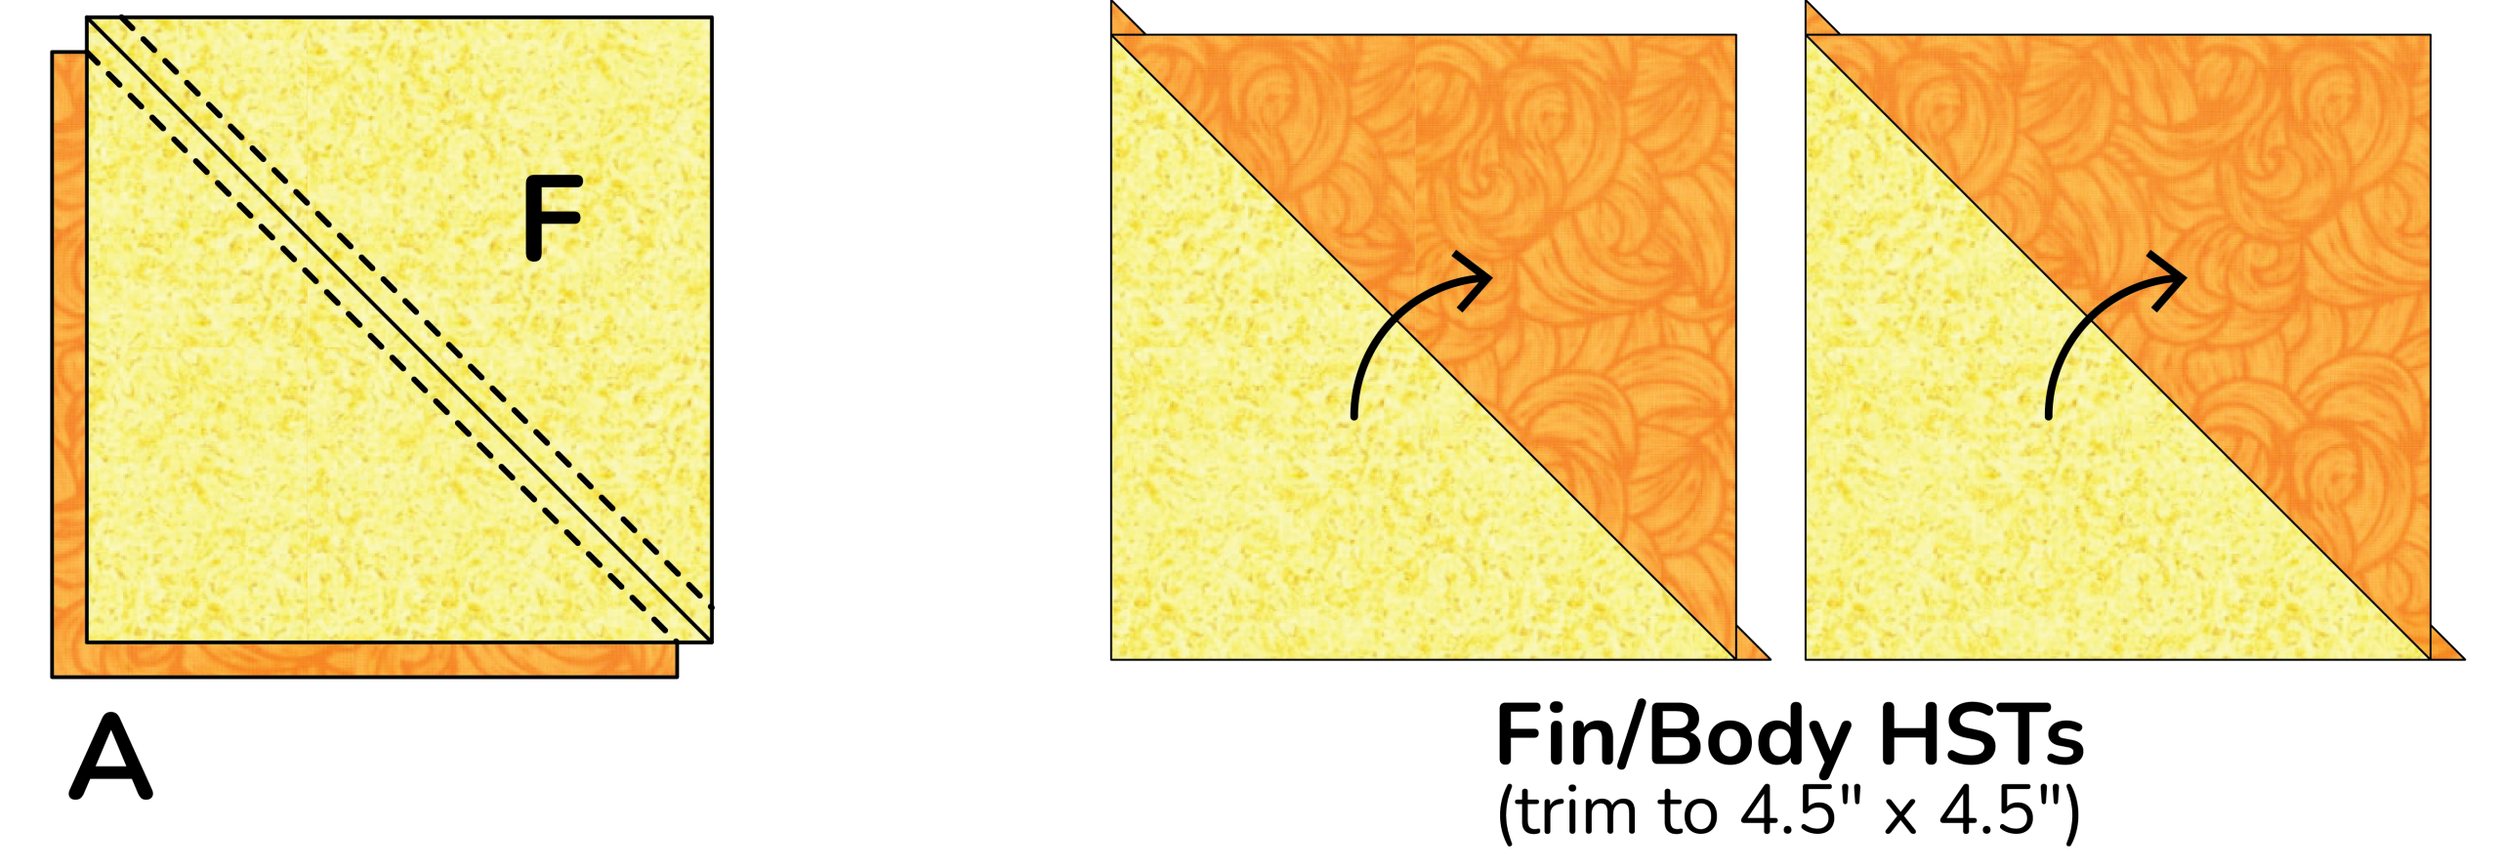
21 - Draw a diagonal line on the wrong side of each F fins fabric square.
22 - Place each marked F square right sides together with an A body fabric square, then sew ¼″ away from the line on both sides.
23 - Cut along the drawn line, then press open and trim to make 4.5″ x 4.5″ HSTs.
24 - Draw a diagonal line on the wrong side of each E fin square.
25 - Place the marked E squares right sides together with the P background squares, then sew ¼″ away from the line on both sides.
26 - Cut along the drawn line, then press open and trim to make 5″ x 5″ HSTs.
27 - Draw a diagonal line on the wrong side of the A body squares.
28 - Place each marked A square right sides together with each of the 5” x 5” HSTs from Step 27. Orient the drawn line to be perpendicular to the HST seam, as shown.
29 - Sew ¼” away from the marked line on both sides, then cut on the drawn line. Press open and trim to make 4.5” x 4.5” SQSTs.

Return to the original pattern for steps 30 and on!